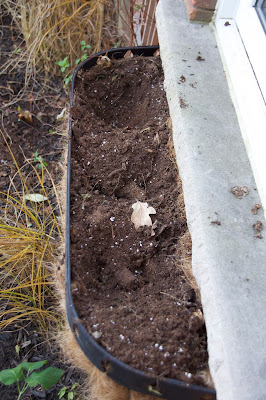
It was a beautiful day here in Southern Ontario, so we took the morning and finished the garden chores.
Though pruning, mulching and bulb planting are important, we also took the time to prepare our
winter urn arrangements!
We have been blessed with a warm spell making it the perfect time to dig in.
Our Canadian winters can be a bit temperamental -
dry, windy and even day's of warmth will roll through before the deep freeze set's in to stay.
We don't know about you but, we find nothing more disappointing then a
dried out holiday urn before we even reach the holiday's!
Here are a few tips to make those urns lush and green all holiday season through:
Prep is important!
Along with all of those luscious winter greens you will be picking up, don't forget to stop in at your local florist to pick up some floral foam!
Gather your clippers, a bucket of water and your floral foam, along with your greens and head out to the garden with us.
Step 1
Fill your bucket full of fresh warm water and gently drop your floral foam in!
DON'T PUSH IT DOWN!
Floral foam needs to soak from the bottom up, if you push it down then you will create a dry pocket in the center of the foam, that is a NO NO.
Step 2
While your foam is soaking move to your planter and clean out all of the plants from the season past.
with out removing to much soil, make a trench for your foam pieces to fit in.
Step 3
Grab your bucket of soaked foam and gently place your foam into the trenches you have made ... resist poking your fingers in the foam .. my kids love to make holes in it and you may too!
Fill in the gaps between the foam and around the edges of your urn to keep it all in place.
WATER your filled Urn to dampen the soil.
Step 4
Once you have prepared your pot you can start your design!
We suggest adding your large focal elements first, this ensures you have plenty of room for their bulky stems
(think birch poles, manzanita branches or even small pyramidal evergreens!)
Finally
Grab your clippers and your greens, It is time to design!
*** Always re-clip/cut the ends of your fresh greens before you add them in!
*** Make sure you insert the stems deep into the damp soil and foam.
*** You do not need to inser all of the stems into the foam but make sure the smaller branches make it in :)
Extra design tips
Start with your biggest pieces first, this will give you a boundary shape to stay within and it is best to start big rather then to add more to the size later.
Once you have determined your width and height with your biggest pieces, stand back and view your design. Check for even shape from all the sides it may be viewed!
Use plenty of textures and variety of winter greenery, working with the front and backs of your greens will add colour and texture depth (flip over your greens and you will see !)
Fill out your form and then go back in and add your additional decorations !
Enjoy!
We are off to shop for some Urn BLING!
P.S. be sure to keep your soil moist until the deep freeze comes. Once it get's truly cold your foam blocks with freeze everything perfectly into place all winter long!


